4.2: Creating & Editing Content Overview
Creating Content
Whether you’re starting a new textbook or adapting an existing resource, content creation is one of the biggest parts of your project, as this is where you put together the bulk of the resource. This section will walk you through the content creation phase, including things to keep in mind while authoring the book, creating ancillary materials (slide decks, question banks, assignments, sidebars, workbooks, etc.), adapting a book, and how you can set up your project to make it an enjoyable and rewarding experience for both the content authors and support team members.
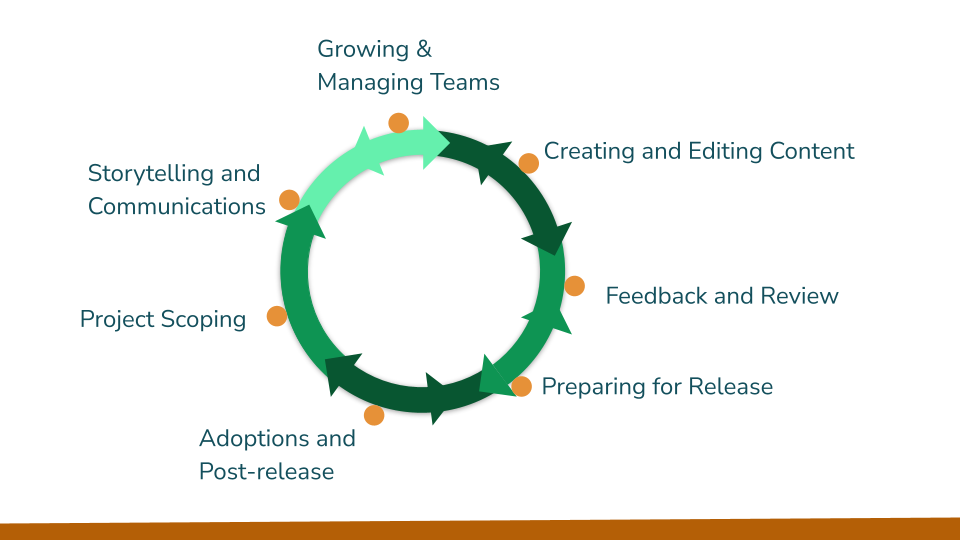
In Project Scoping, we explored the whys and hows of scoping out and starting on your open textbook project, including articulating why your project is important to you and your primary goals for the resource. Next, you read about Growing and Managing Teams – from why they’re important to various roles & responsibilities, and how to effectively collaborate with teammates.
One of the underlying principles of this part of the publishing process is keeping the audience front of mind. Authoring teams should have a clear understanding of the book’s audience, why it’s being created, what needs it fills, and how to keep the content culturally relevant and accessible. Having spent time thinking about the significant learning outcomes for your OER in the earlier stages will make it easier now to draft an initial outline. It will also help you consider specific elements in your materials such as learning and assessment activities that will support your students in unique and innovative ways.
No single writing approach works for all projects. Instead, it will depend on the content creation team that you have in place and the type of resource you are trying to produce. Read through the sections below, and consider the suggestions as you decide what content that needs to be produced, adapted, remixed, or researched (text, images, videos, interactive elements, case studies, etc.). See our section on considerations when creating & editing content for more details and considerations.
Authoring teams
Before we dive into the nitty-gritty of creating content, let’s first take a look at the people behind the work. We believe that a collaborative dynamic means multiple perspectives are embedded in a text, which is ultimately better for readers. Authoring teams should have multiple people collaborating, such as subject matter experts, instructional designers, curriculum developers, etc.. In our experience, an ‘ideal’ project team isn’t homogenous — it doesn’t solely consist of subject-matter experts or a group of librarians. Rather, we think that by having people from different roles such as librarians, teachers, students, accessibility practitioners, technologists, etc., the social and informational diversity of your project increases.
A team can develop a clear sense of shared ownership over the project, without the same level of work needed if you were to go it alone, but it takes some effort to keep everyone on the same page. This shared ownership will look different for different teams. For example, if you are the only author on a text, do keep in mind that you will need to rely on peer and classroom review for feedback and different perspectives or expertise, as it’s your main chance to get other eyes on the content. In these cases, be sure to give good guidelines to your reviewers so you can get the specific kinds of feedback you need, along with anything else they see fit to highlight.
Collaboration supports you in connecting your OER with intentional pedagogy, so as you have discussions and make decisions with your team, we encourage you to pause and reflect on the difference that you are making in the lives of your students — with the content, with the ways you teach it, and via the teaching and learning experience more broadly. This is where you can be innovative and make your OER stand out as a unique learning tool. Refer back to the roles and responsibilities section to use as a guide to decide what will work best for your team’s needs. No two projects will take the same approach or will comprise the same individuals, and as such, the process of creating content will always be very different.
Creation process
Intentional alignment to outcomes
As you begin preparing and planning your content creation, it is important to remember that your audience is students – you’re creating (or remixing) this OER to support their learning, growth, and development! So start with an intentional alignment to outcomes. We suggest thinking back to the learning outcomes you articulated during project scoping and intentionally align them with the content of your OER. The process of content creation extends beyond creating the content – it also includes looking at techniques to make meaningful learning experiences for students. A core factor in that process is ensuring that the content and assessments your team uses or designs integrate well with the content you’re developing.
Alignment with your overarching goals is equally important when you create the means to measure student growth and progress. That’s where the concept of authentic assessment comes in. As it turns out, your OER can include innovative and authentic assessments that provide students with ample opportunities to rehearse, practice, consult resources, and get feedback. An authentic assessment is one that
- is realistic.
- requires judgment and innovation.
- asks the student to “do” the subject.
- replicates or simulates the contexts in which adults are “tested” in the workplace or in civic or personal life.
- assesses the student’s ability to efficiently and effectively use a repertoire of knowledge and skills to negotiate a complex task.
- allows appropriate opportunities to rehearse, practice, consult resources, and get feedback on and refine performances and products.[1]
Content creation and assessment are not separate, distinct items to develop. Rather, they inform each other and should be well-integrated to best support educators and students. Have a discussion with your team about how content and assessment can be scaffolded, and then create a plan that works for you. While assessment may be a task farther down the road, it’s important to be mindful and intentional about your approach even at the start of content creation. To help guide these conversations, we’ve compiled a few questions to consider. As you you make decisions about content:
- What are the core pieces that you want your students to remember?
- Based on your expertise, what content will serve your students best in the future?
- How can the resource begin to model the critical thinking required for the course assessments?
As you make decisions about assessments:
- How does it enable students to practice the key skills and learn the central content of the unit or course?
- Are there checkpoints for students to make mistakes and recover?
- Does it offer some longer term, transferable skills that students can takeaway?
There is a unique opportunity here to create an integrated, meaningful learning experience for your students while collaborating with other passionate educators. Have a discussion in your team about how content and assessment can be scaffolded, and then create a plan that works for you. While assessment may be a task farther down the road, it’s important to be mindful and intentional about your approach even at the start of content creation.
Authoring workflow
Writing good content is easier with good documentation. Transparent documentation and good project management will help your teams move through this stage smoothly. Approaching writing with the right foundation will make not only the writing process easier, but also editing and reviewing down the line. So whatever the makeup of your authoring team, putting in the time to plan your content and make some key decisions up front is the single-most important thing you can do.
As you make these decisions, we encourage you to keep flexibility in mind. All the members of your team who teach may have unique pedagogical styles, and we don’t want the structure you offer to smother or stagnate that. Rather, you want to provide flexible guide rails that ensure that students have the best possible learning experience. We recognize that accomplishing that while integrating elements of authentic assessment is no easy feat!
That being said, that’s where the power of OER really comes to the surface – you’re currently working on the first iteration of your resource. Over time, your resource can grow to become more expansive and comprehensive. So, even as you make these decisions about what to include and how best to do so, know that these are not limiting decisions. In the long run, you are setting up your resource, your team, and the end users of your OER for a great learning experience.
One of the first decisions to make is how your OER will be structured. Elements of textbook structure can support student learning in a meaningful way. By ensuring consistency in how the content is delivered and presented in the text, students can focus on absorbing and applying the information more efficiently. We’ve created an OER Structure Template to support your teams in planning the structure of your resource. Creating or reviewing an outline with your team can also help to identify potential areas of overlap between chapters, or complementary sections, allowing authors to write with an eye to the larger text as they go, which will help reduce the need for substantial editing down the road.
With the outline in hand, you can also prepare an author guide. This is another central tool to ensure shared understanding and consistency, and can include a style guide, chapter template, model chapter, as well as information about writing tools, licensing, accessibility, media, non-textual elements, author expectations, submission information, and contact details for the lead author or project manager.
As the project manager or content coordinator, you should also put together a simple tracking sheet to keep an eye on the status of each piece of content. Having this information collected in one document will save you the time and mental frustration of looking through emails, chats, or other conversations with authors for an update. We’ve prepared a content tracking template and an image tracking template that you can copy and adapt for your project as needed.
Checking permissions on images, excerpts, and other media in your book is a team effort, and these spreadsheets will make the process much easier. The project manager or section leads can identify open repositories to source these elements, while authors can do an initial check when including external content in their contributions. When it comes to confirming permissions, the editor assigned to a given section can more easily conduct a final check. This type of work is sometimes best done when going through the book line by line, so if your team does not have a member dedicated to rights and permissions, then the copyeditor can take this on, in line with their fact checking duties. Finally, make sure you share these documents with the authors, and use this opportunity to conduct an author call and introduce various members of the team with one another. If your team is spread across different time zones, you could instead share the information on a public discussion forum, email, or using whatever agreed upon methods of communication suit your project. Relay information about deadlines, expectations, and process with the authors, address any questions that come up, and incorporate any other information authors identify as being useful to them. Then, it’s time to let them write!
It’s good to give authors the space they need to make content, but at the same time, it can be a solitary process and it’s good to make sure that they don’t feel isolated from the rest of the team and any other progress being made. Ongoing collaboration and communication between authors and the team will help, and it can also provide some gentle nudging to help keep people on track. It’s also good to be able to course-correct as you go, rather than only catching issues or confusion later in the process. If possible, conduct regular check-ins and author calls, and if authors contact you with any questions over the course of this period, start building a list of FAQs to share with the team.
Lastly, once you’re collecting content that has been drafted or is ready for the next stage, thank the author for their time and provide clear details regarding the next steps in the process so they know what happens next. If the author’s involvement will be needed down the line (e.g. to implement revisions after editing and peer review), let them know now so this work doesn’t come as a surprise later. Now’s also your chance to make sure you can keep the author engaged going forward, by providing project updates or more (see our engagement guide for ideas). Authors can become great champions and even adopters for your project in future.
Remixing considerations
If you are remixing resources, the process of writing for a student audience might look a bit different. Rather than starting from your own writing style or tone, you’ll be building off of someone else’s. You may not be designing the pedagogical devices and chapter structure from scratch. That being said, you can still use these recommendations to guide the revisions you make to your resource. As you do so, consider:
- What could be better, in terms of organization, tone, style, sentence-level clarity, or integrated pedagogical devices?
- In what areas should special attention be paid to inclusivity and cultural relevance? To technical accessibility?
- This is also a prime opportunity to begin localizing content. What examples can you bring in to make the content relevant for your students? How do the challenges or concepts you are covering surface in this particular region?
With all of this in mind, you should be mindful to concentrate your team’s energy on the aspects that are most important. Timeblock this work especially if your team is planning on drafting additional content, so you are spending the majority of your time on the most critical pieces.
Editing Content
Creating content without editing is fairly meaningless — as editing is about connecting different portions of the book, refining and polishing the drafts at hand, applying consistency to each section, and helping to ensure the formation of a cohesive resource that meets learning objectives. Editing can play a role in every project — regardless of whether your project is a large collaboratively authored one in need of editing for consistency, or an remixed adaptation project built on an existing resource. In what follows, consider our guidelines as you are creating a new open textbook, adapting an existing book, or remixing multiple resources – editing is critical to each of these projects, but might surface in different ways.
Special thanks to Elizabeth Mays for her contributions to this overview – Liz is the former marketing manager for Rebus and former director of sales and marketing for Pressbooks, as well as adjunct faculty member at Arizona State University, and author and editor of two open textbooks (Media Innovation and Entrepreneurship and A Guide to Making Open Textbooks with Students)!
Purpose
Why does editing matter? While content creation brings the raw materials together, editing gives the resource structure and appeal which can significantly impact how useful it is for learners. This is the ideal opportunity to ensure that larger themes and connections are integrated throughout. We’ve highlighted a few key benefits on the slide. In addition, it serves as another great opportunity to check for equitable practices and inclusive course materials — acting as a form of review.
It’s also important to know that editing is really an umbrella term for a lot of different processes. It can be useful to think of editing in terms of scale, with different editors performing different tasks at the beginning, middle, and end of the project. Editing starts with the big picture, like the subject of the OER and how it is treated, as well as the broader discourse of which the resource will be a part. It then narrows in on mid-range aspects, such as how the chapters are ordered and structured, and what themes will be included or left out. Usually (though not always), the editing that takes place later on gets down to more granular details, including fact-checking and spelling and punctuation. Remembering to keep the different scales of editing in mind throughout the project is good if you’re aiming at creating a well-rounded resource. Through this approach, editing ensures that the content fits the purpose, and fulfils the learning objectives that you set out for the resource during project scoping.
Editing is also a valuable way to have many different pairs of eyes on the content throughout various stages of creation, from conception and first drafts through formatting, proofreading, and the final versions before release. Along the way, editors will make everything from substantial to incremental revisions, improving the overall quality, readability, and relevancy. In this manner, editing also functions as a kind of review, where people who are not necessarily subject-matter experts read through and adjust the content. Editing as review is an important aspect of this process, and a useful source of critique, feedback, and suggestions that will ultimately improve the resource.
Types of editing
As mentioned at the start of this section, editing can take place during all phases of the project, as early as project scoping, and as late as final formatting. While there are additional ways to parse out the editing process, we find that what is most useful for OER projects like yours to consider is editing in these two major buckets:
- structural and substantive revisions to content, and
- copy editing and proofreading.
Substantive editing
In the first major bucket, we find substantive, content-level editing. This is really editing of the content, conducted by someone with subject-matter expertise. This stage of editing has a heavier lift associated with it, as it may include reorganizing sections, rewriting sentences, and making various other recommendations to the authors. A good way to structure this type of edit is to use your regular meetings or have a scheduled routine for your faculty authors to share drafts with one another. Use this time to ask questions such as: Do drafts fit the model chapter you have all outlined? Is there a critical gap in the discipline that someone notices? Can specific edits be made to improve cultural relevance? You can get your faculty members to switch drafts with one another to check for these pieces. Your role as lead will be to facilitate this exchange and process of resolving questions and problems. Because these changes are more extensive and collaborative, they typically take place wherever the authors are composing, for example MS Word or Google Docs. This type of editing is all about making sure the OER is set up to meet learning objectives, and in so doing, that students are set up to succeed.
Copy editing & proofreading
In the second general bucket, we find more granular revisions made to ensure consistency and polish across the resource: copy editing and proofreading. This involves a very close reading of the text to catch needed corrections to sentence structure, grammar, syntax issues, vocabulary, and punctuation. Editors at this stage may also attend to some level of stylistic concerns to help the book have a consistent tone and voice — this can again be done internally in the team with ‘final’ drafts or maybe even rely on other support like graduate students interested in being part of the project. Since this edit happens at a later stage when content may be placed in Pressbooks, it may also involve checking permissions on images, media, quotes, excerpts, and other elements, as well as layout consistency and formatting.
Both of these editing stages can benefit from the perspectives of the subject-matter experts on your teams. That being said, you all as librarian leads can bring a lot of insight to this process as well! As librarians, you may be more versed in what common questions or challenges students bring when encountering these subject areas early on in their academic careers. You may be able to identify areas that need increased clarity or readability for students. And, importantly, you’re also in a position to push for the team to make changes that center equity concerns we’ve been talking about throughout the year. As we move on to talk a bit more about the logistics of editing workflows, we hope that we can keep in front of mind the ways in which you are uniquely positioned to support insightful revisions.
Editing workflow
Similar to content creation, successful editing processes require creating and maintaining a clear workflow or process for the team to follow. We’ve compiled an example workflow below with some suggestions to guide you through the editing process. There is no “one size fits all approach” to editing workflows, so feel free to adapt these suggestions to best meet the needs of your team.
- Authors send chapters to editors
- Editor(s) review(s) chapter, leaving comments
- Authors make changes and then submit for copy editing.
- Copyeditors review parts.
- Final round of proofreading, with special attention to formatting and accessibility.
As you can see, we recommend beginning by assigning editors to chapters. It makes the most sense to assign content authors to edit chapters that they are not themselves authoring. Editors can leave comments in Google Docs or whatever authoring tool your team is using. Take advantage of the suggestions mode or track changes options in these tools rather than making too many copies of a chapter, as it can easily get out of hand to manage!
One of the first pieces of editing advice we have to share is this: time-box this work – particularly the more substantial editing pieces. Revisions can become a never ending cycle. Be intentional with your time and energy by avoiding too many phases of passing content back and forth between team members. The order of editing processes usually follows the outline above—from bigger scale to smaller—and as usual, we find that the more you do upfront, the better. However, you may find that all chapters follow their own timeline to a certain extent, and from week to week may be at different stages of editing. Factors like the timing of what has already been written, what resources you have available, and what holdups arise will all affect the editing process.
The order of editing processes usually follows the outline above—from bigger scale to smaller—and as usual, we find that the more you do upfront, the better. However, you may find that all chapters follow their own timeline to a certain extent, and from week to week may be at different stages of editing. Factors like the timing of what has already been written, what resources you have available, and what holdups arise will all affect the editing process.
We also recommend the timeless strategy of underpromise and overdeliver on deadlines. This builds in some cushion for when deadlines get pushed back. This will help prevent the entire project from going off track if there are delays in small portions.
Once this initial substantial feedback has been provided, the original chapter authors will be given time to respond to the editing comments and suggestions. Then, it may be helpful for the revised chapter to go to another member on the team who has yet to see this section. Be sure to foreground exactly what type of feedback you are looking for at this stage, as it can be tempting for folks to give a bit too much for the context. It’s okay to be directive here and provide a list (perhaps in the author guide) of exactly what should be checked. A second look may not be possible for all teams, so remember to adapt this workflow to suit your individual project timelines.
For the copy editing and proofreading portion of this work, we suggest that you rely on the stylesheet in your author guide that your team developed earlier on in the process. It can be best to save this portion of the work once the content has been formatted in your chosen publishing tool, to catch the most minor details at once. And as we said earlier, editing will always expand to fill the time you allot for it. Don’t dwell on making everything perfect on the first go. Remember that OER are living documents with opportunities for improvement in future versions.
Finally, regardless of which of these editing phases you are in, you can work through this process in chunks. Rather than waiting for the entire collection of chapters, you can parse out a set of chapters to go through the substantial editing round, and once that’s completed, move them onto copy editing and proofreading. Essentially, this amounts to staggering the work, enabling the team to continue to make progress as other project pieces are still in development. As you see, all these considerations are really meant to help you move things forward — to refine the resource, improve it, while keeping you on track with your timelines.
Hiring editors
Whether you rely on volunteers from your team or pay professional editors during this phase, the process allows you to incorporate external and/or non-expert feedback, making the book more accessible for all kinds of readers.
If you’re looking to hire professional editors, you may want to turn to editorial associations such as the Editorial Freelancers Association (EFA) and the American Copy Editors Society (if you are based in the US or Canada), or freelancing sites such as Upwork. Note that costs will vary according to the type of work being done, the editor’s experience level, and other factors, such as subject matter or technical expertise required. Be prepared for a range of hourly rates, anywhere from $25 to $125 (or more). The EFA has a helpful list of rates for freelancers, so we encourage you to take a look at them while carefully considering your project’s editorial needs.
This is also an opportunity to collaborate with others at your institution and build capacity for future open projects. For example, are there any institutional grants available to hire editors? Are there ways to include students throughout the editorial process? It’s also good to ask around in your professional networks, and perhaps ask for referrals for editors who might have worked on similar projects in your field.
For those looking for the least expensive path, we recommend that the project leads do a first round of subject matter and copy editing. After that, they can hand the book off to a developmental editor to look at as a whole, and finally to a versatile copyeditor who is familiar with your style guide. Although these editorial guidelines are generally true for most OER, remember that every project differs.
Rebus’ experience
Over time, we keep being reminded that OER projects are never the same – they each have different goals, and as such, different needs. Below, we share a few examples of how editing has played out differently in some of the open textbooks that we’ve supported, so you can see how variable these processes can be.
Perhaps one of the biggest lessons learned to date is around timing and editing. We supported one project in which the project leads decided to keep things moving on a rolling basis, rather than waiting for all the content to be ready before moving it into the editing phase. In this case, a draft editorial workflow was prepared, and as chapter drafts came in from authors (often at different times), the team moved them to the subject matter editor right away, and from there on to peer review. On this project, it was decided that the content editor would also think about structure and take on a more developmental editing role, and that copyediting and proofreading would take place post peer review.
On other projects, we learned about the importance of a developmental edit. The Media Innovation and Entrepreneurship open textbook benefitted from the fact that one of the book’s lead editors was both a subject- matter expert and experienced editor. A majority of this editor’s time on the project was spent conducting a developmental edit of chapters in the book, ensuring the coherency in voice across the book, leading to a more cohesive and valuable resource for students and instructors. With open textbook projects that have multiple authors, this type of edit is extremely useful to check for consistency in structure, tone, voice, and language across the book.
Across multiple projects, we have run into some common questions that seem to recur:
- Should the author, editor, or both make changes to content?
- What is the clearest way to demonstrate workflow?
- How can timelines be effectively communicated and reinforced?
- How do we share common tools for editing, formatting, and revisions?
Giving your team some clarity over ownership, practices, and deadlines during the editing phase will make the process smoother. Trust us, we’ve had to learn this lesson the hard way!
As the project manager or lead of the editorial team, you are the ultimate decision makers for your open textbook. If you can’t get the content into a state with which you are comfortable, you are not obliged to include it in the release. When something does go wrong (and it almost always will), there are some effective techniques for handling difficult situations with care and equanimity:
- Talk face-to-face with those involved, and if you can’t be in the same room, at least try to be on-screen with each other.
- Consult frequently with your leadership team, soliciting and listening to their feedback.
- Make sure that the owner of the editing process is the messenger of news (good or bad)
- If you’re the editorial process owner, feel confident when asking for changes to a chapter, and feel free to point to signed MOUs if you need to confirm your rights to use the content.
- INDIANA UNIVERSITY BLOOMINGTON. 2019. “Authentic Assessment.” Center for Innovative Teaching and Learning. 2019. https://citl.indiana.edu/teaching-resources/assessing-student-learning/authentic-assessment/index.html. ↵
